

Hey there, my DIY enthusiast friend! Everybody loves a refreshing glass of water, especially from a water dispenser. But have you ever wondered how clean your water dispenser is? Probably, a lot less often than you should!
Performing a “How to Clean Water Dispenser” search, you’ve found yourself here – and we’re delighted! If you own a water dispenser, keeping it nice and clean is crucial.
This guide will cover everything you need to know about cleaning your water dispenser right in your home. So read on, and let’s get your dispenser squeaky clean!
Importance of Cleaning Your Water Dispenser
It’s time we talk about something essential – why cleaning your water dispenser is so vital.
Did you know bacteria and mold can build up in your dispenser over time? Yep, it’s true! Cleaning your dispenser regularly keeps these yucky elements at bay and ensures that your dispenser runs more efficiently.
Plus, let’s face it, nothing beats the taste of truly fresh and clean water. You don’t want any unwelcome surprises in your water, do you? So let’s dive deeper into the water dispenser cleaning process and keep that H2O tasting great!
Identifying Signs Your Water Dispenser Needs Cleaning
When was the last time you gave your water dispenser a quick inspection? There are a few signs that suggest it’s time for a good clean-up.
If you notice a weird taste or smell in your water, it’s an unmistakable signal. Also, be observant of mold or mildew spots in your dispenser’s reservoir or spigots. Are you hearing funny noises or observing slower dispensing? That’s another clue!
If you detect any of these signs, it’s high time to learn how to clean your water dispenser. Let’s roll up our sleeves and get to it!
Materials Needed to Clean a Water Dispenser
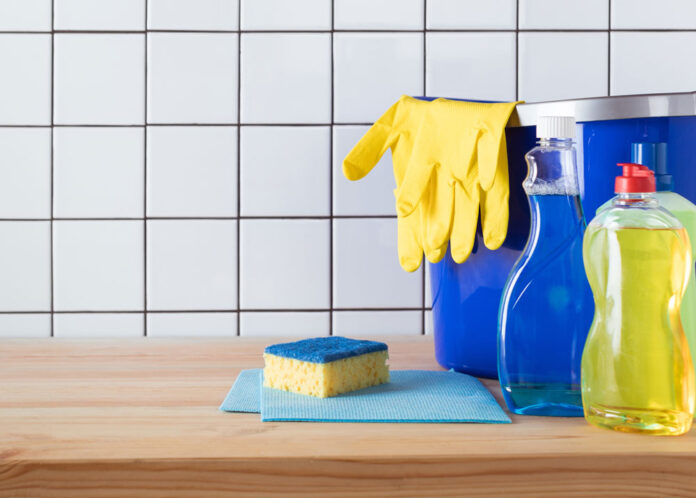
My friend, are you ready to embark on this cleaning adventure? But wait! First, we need to gather our tools. You’ll need the following:
- A clean bucket or container to collect water
- A clean sponge or cloth for wiping
- A gallon of water for rinsing and mixing with vinegar
- Distilled white vinegar, the secret weapon against grime and scale
- A long-handled scrub brush to reach every nook and cranny
- Kitchen gloves to protect your hands
- And yes, a little bit of elbow grease
Got everything? Awesome! You’re fully equipped to conquer the water dispenser cleaning quest. Let’s do this!
Step-by-Step Guide on How to Clean Water Dispenser
It’s time to get down to business. According to a review of HomeTopPicks.com on the best water dispensers in the Philippines, there are several types of dispensers, such as countertop, freestanding, top-load, or bottom-load. So, the cleaning method may differ slightly.
But don’t worry! This guide will focus on a general method that should work for most models. Let’s learn about the detailed steps to clean your water dispenser.
- Step 1: Unplug the Dispenser: For your safety, the very first thing you should do is unplug your water dispenser. We don’t want any electrical mishaps!
- Step 2: Remove the Bottle: Remove the water bottle from the top or bottom of the dispenser. If there’s still water left in it, save it for later or use it for plants.
- Step 3: Access the Reservoir: Your water dispenser will have a reservoir where the water is cooled or heated. Follow the manufacturer’s instructions to access it.
- Step 4: Drain Reservoir: There should be a plug or valve that you can open to drain out any remaining water. Carefully drain it into a bucket or down the sink.
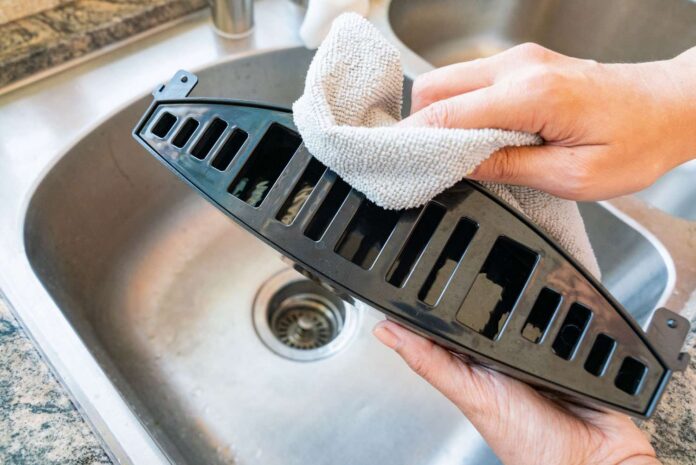
- Step 5: Wipe and Rinse: Take a clean sponge or cloth and gently wipe the inside of the reservoir. Depending on your model, the reservoir may be removed so you can rinse it under the tap.
- Step 6: Mix Your Cleaning Solution: Now, it’s time for the deep clean. Mix a gallon of water with a cup of distilled white vinegar. This solution is an excellent cleaner that naturally descales and disinfects.
- Step 7: Fill Reservoir with Cleaning Solution: Pour your vinegar-water mix into the reservoir. Let it sit for about 15-20 minutes but not much longer. You don’t want to damage the water dispenser.
- Step 8: Scrub Reservoir: Take a long-handled scrub brush and gently (but thoroughly) scrub the sides of the reservoir. Don’t forget to scrub the water lines, too!
- Step 9: Drain and Rinse Again: Like in Step 4, you’ll want to drain your dispenser to eliminate the vinegar mix. Once empty, rinse with clean water until there’s no vinegar smell.
- Step 10: Dry Completely: Here’s an essential step that people often rush – don’t! Ensure your dispenser is thoroughly dry to avoid encouraging mold or mildew growth.
- Step 11: Reassemble and Plug Back In: Now that it’s clean and dry, you can reassemble the dispenser and plug it back in. Before you place a new bottle, consider cleaning the neck of the bottle with soapy water.
And there you have it! Following these steps should help you keep any water dispenser shiny and fresh – giving you clean and safe water. But remember, while this guide works for most, always refer to your manufacturer’s manual for specific cleaning instructions.
Pro Tips for Cleaning Your Water Dispenser

Ready for some insider tips? Alright, let’s take your water dispenser cleaning skills to the next level:
- Use Vinegar, Not Bleach: Vinegar is a natural disinfectant, and it’s safe for your dispenser. Bleach can be harsh and may leave a residue.
- Don’t Rush the Drying: This is key. Letting the dispenser dry completely is crucial to prevent mold or mildew.
- Regularly Clean: Don’t wait for signs of dirtiness. It’s a good practice to clean your dispenser every 2-3 months as a preventative measure.
- Scrub Gently: Abrasive materials can scratch your dispenser. Always scrub gently and use soft materials.
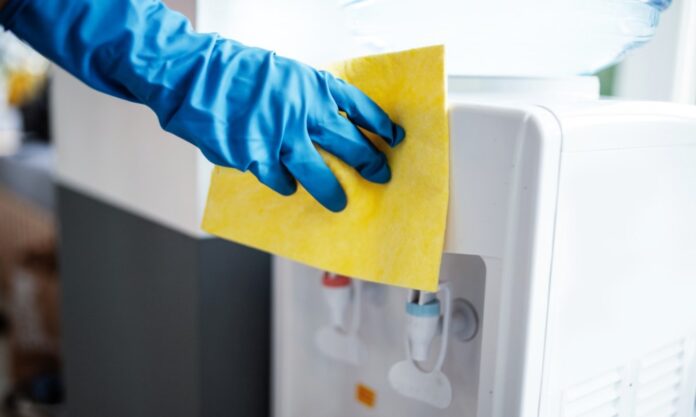
- Clean the Exterior, Too: Don’t forget about the buttons and outer surface; these need a wipe down too!
Keep these pro tips in mind, and I promise that cleaning a water dispenser will feel almost like a walk in the park.
Conclusion
You made it to the end of our mini journey! We’ve broken down the ins and outs of “how to clean your water dispenser.” Not too ominous a task, right? By regularly cleaning your dispenser, you won’t just enjoy fresher and better-tasting water; you’ll extend its lifespan and strengthen its efficiency.
We learned the crucial signs indicating that your dispenser needs a clean-up, stocked up on necessary cleaning supplies, and then marched into the step-by-step process. We even upped our game with some professional tips and tricks!
Remember, every water dispenser is unique, just like its owner, so always refer to your manufacturer’s instructions. Don’t forget to share this knowledge with your fellow water dispenser-owning friends. Everyone deserves clean and delicious water. Now, go on and enjoy your crystal-clear water! You’ve earned it! Cheers, friend!


